Subtotal $0.00

As global regulations change, your organization must have the skills and know-how to achieve sustained competitive advantage. EHA Soft professional services team can help. We offer practical experience and knowledge to help accelerate you reduce risk and ensure product and employee safety.
National Software Campus, Mahon, Blackrock, Cork, Ireland T12 XY2N
Welcome to EHA Soft Solutions

Under Construction
Please watch short video below which explains how the Induction Training is managed.
Instructions
Note: If you are an “Existing user” and have “Login” credentials then please follow Steps 1 and 2. Ignore Steps 4-5.
Step 1. To start the induction, you need to click on the INDUCTION button on the landing page instructions for the client.
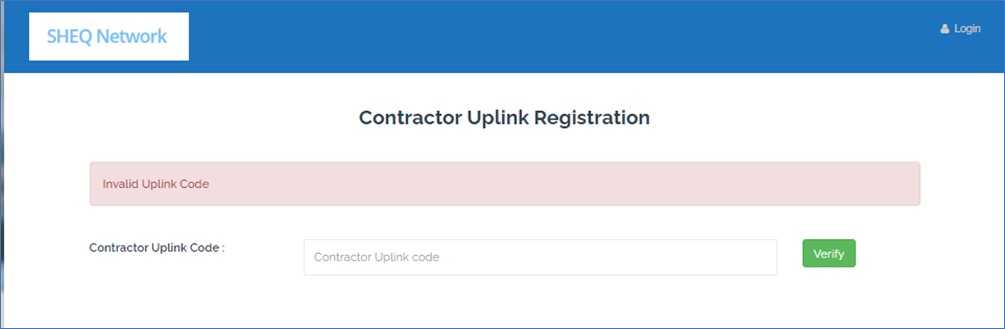
Step 2. If you are a New User or an Existing User please provide the correct employee Uplink Code and click on the “Verify” button. If the “Code” is verified correctly you will proceed to Step3.
If you do not have a valid employee Uplink Code you will not be able to continue. Contact your supervisor to get your code or for technical queries contact contractors@ehasoft.com).
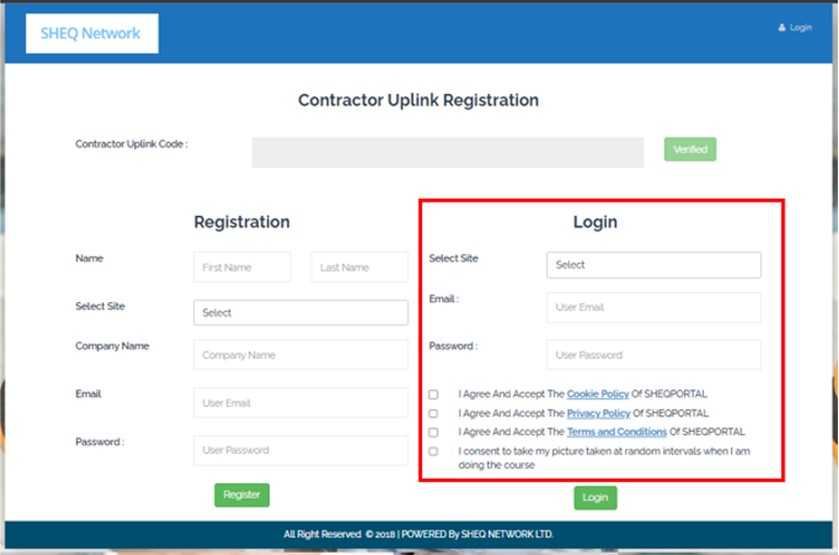
Step 3. Please select the appropriate site that you are visiting from the drop-down list, and enter your Email address, and Password. The Cookie Policy, Privacy Policy, and Terms and Conditions are mandatory to proceed. Consent to have a photo taken during the induction is not mandatory but recommended as the client needs evidence that it is you who actually completed the course. The photos may be reviewed by the client and are automatically deleted a few days later unless there is an issue. Be sure not to include any personal data in the photo like family photos or children. Click the Login button as shown below.
Step4- 5 are only applicable if you are registering as a new user of the System.
Step 4. Before you begin, please note that you will need to upload a photo into your profile section, please have one available on your device to select. If completing the induction on your smart device, you can take a picture and save it, and upload this photo. Please also note there is a voice-over on each slide to help guide the learner, so headphones may be necessary.
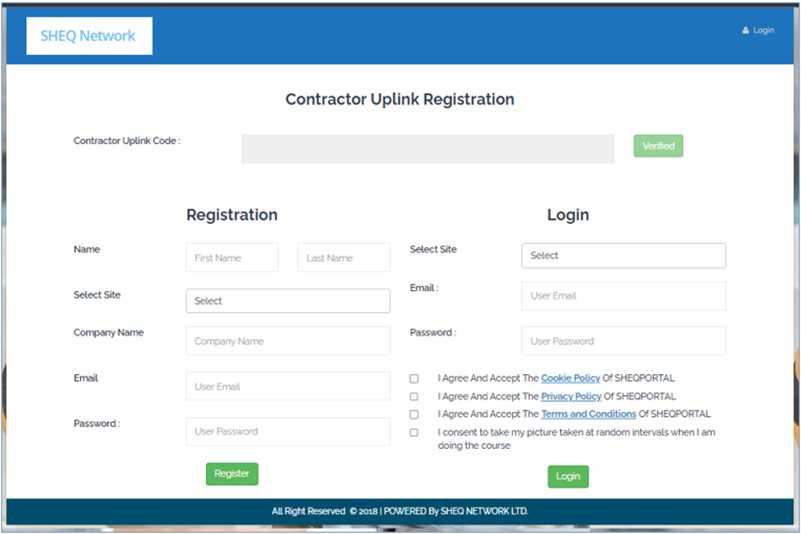
Step 5. Please enter your First Name, Last Name, Email address, and Password which will help you re-login to the site in case you are not able to complete the induction in one session, and click the Register button as shown below. The email must be unique. If you enter a false email, then you will not receive emails for the password reset options or a copy of the Cert of Completion at the end.
Upon successful registration, you will be redirected to the page below where you need to enter the email address(s) to whom you want your Certificate of Completion to be forwarded after the course is complete e.g., your own email, your supervisor, the person who looks after the Contractor Portal, etc. Enter an email address on the page below as highlighted and click on the “Update button”.
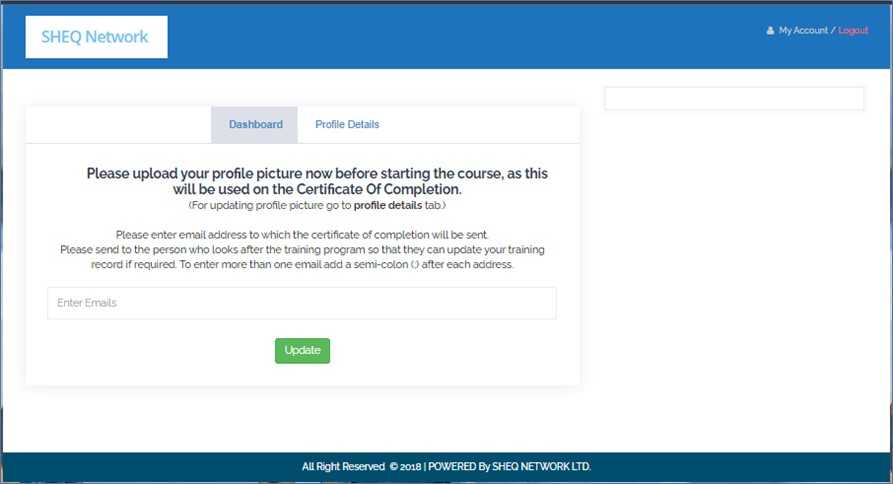
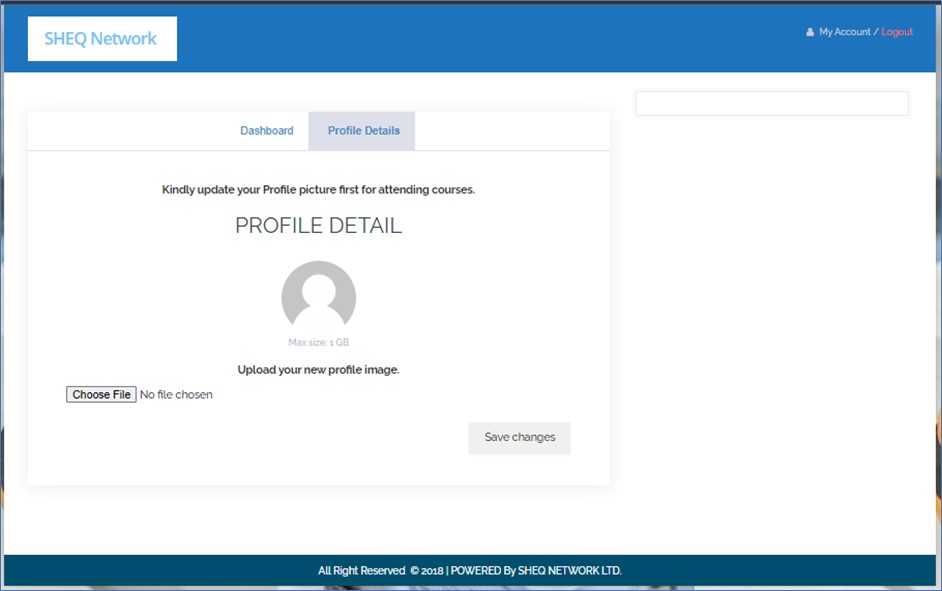
Once you have entered the email address(s), please go to the “Profile Details” section on the webpage. The website will ask you to upload a profile picture which is mandatory to proceed. Please make sure that you have a picture ready with you on your device, or you can take a picture with your mobile phone and upload it.
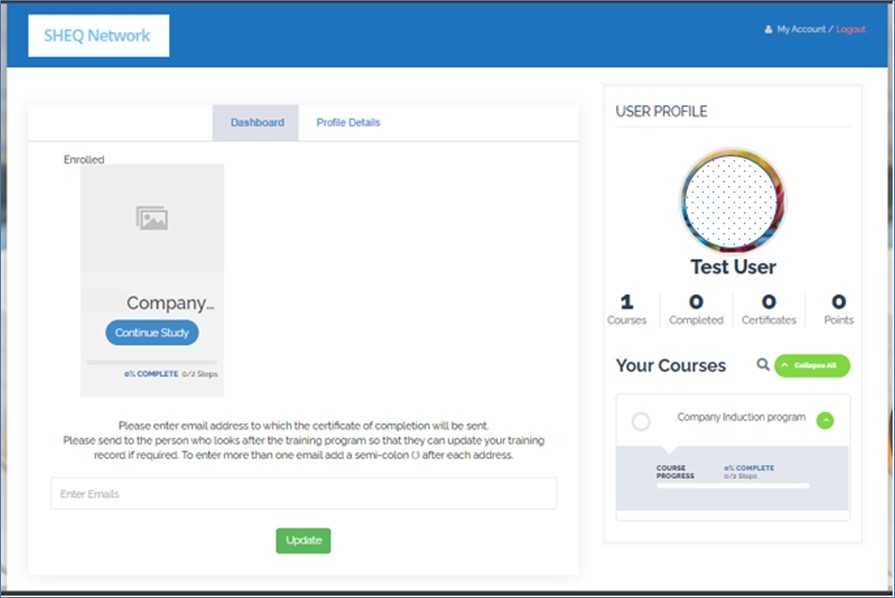
Step 6. Once saved you will be redirected to the page below where you will see the Course(s) which need to be completed. Please select the relevant course on the right side of the page or on the Dashboard page as shown in the below image.
NOTE: If you are an existing customer then you can view the previous courses that you have completed and also the updated course.
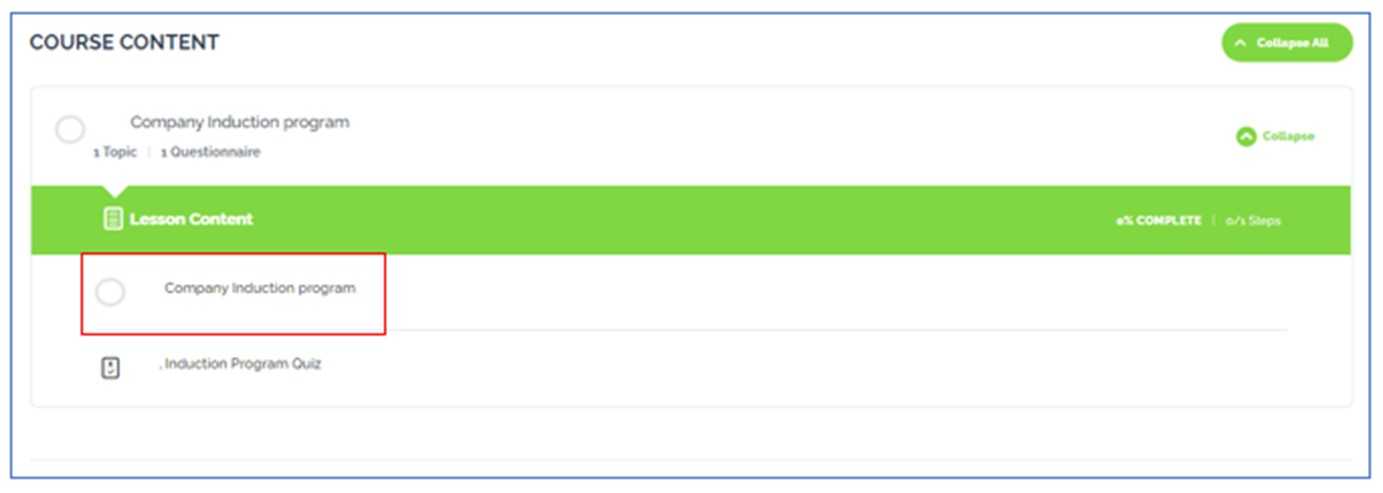
Upon clicking the relevant course, you will be redirected to the following screen. The first hyperlink with the circle next to it will take you to the Course, however, the second hyperlink will take you to the Quiz. Please proceed to the course by clicking on the encircled text.
Step 7. There are two types of course navigation options possible. The first type is where you can progress through each Topic and must mark each Topic complete once you are finished.
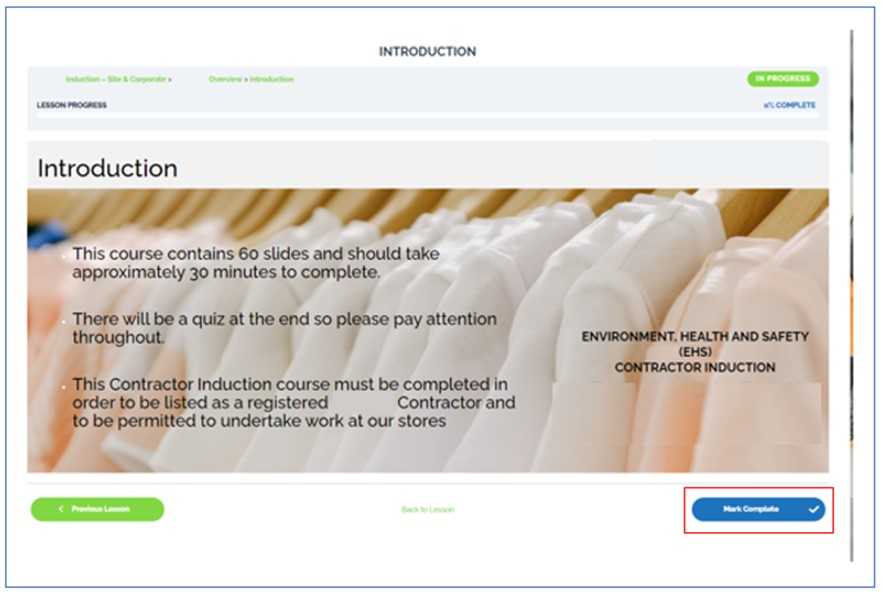
You can use the “PREV” (i.e., previous) and “NEXT” buttons at the bottom to navigate through the course topics as required.
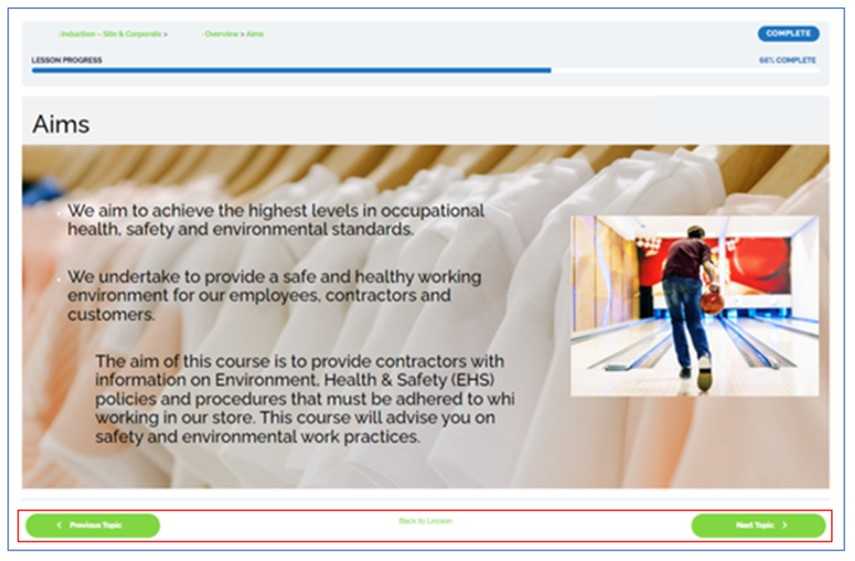
The second type of course navigation is where you simply click the “Next Topic” button, when you have completed the screen and you will then be taken to the next topic.
Please note there is a voice-over on each slide to help guide the learner so headphones may be necessary. Please refer to the images below:
As before, use the “PREV” and “NEXT” buttons at the bottom to navigate along the course topics as required and the “FULL SCREEN” button to toggle full-screen mode. There is a timer bar that shows how much time is left before you can move to the next slide.
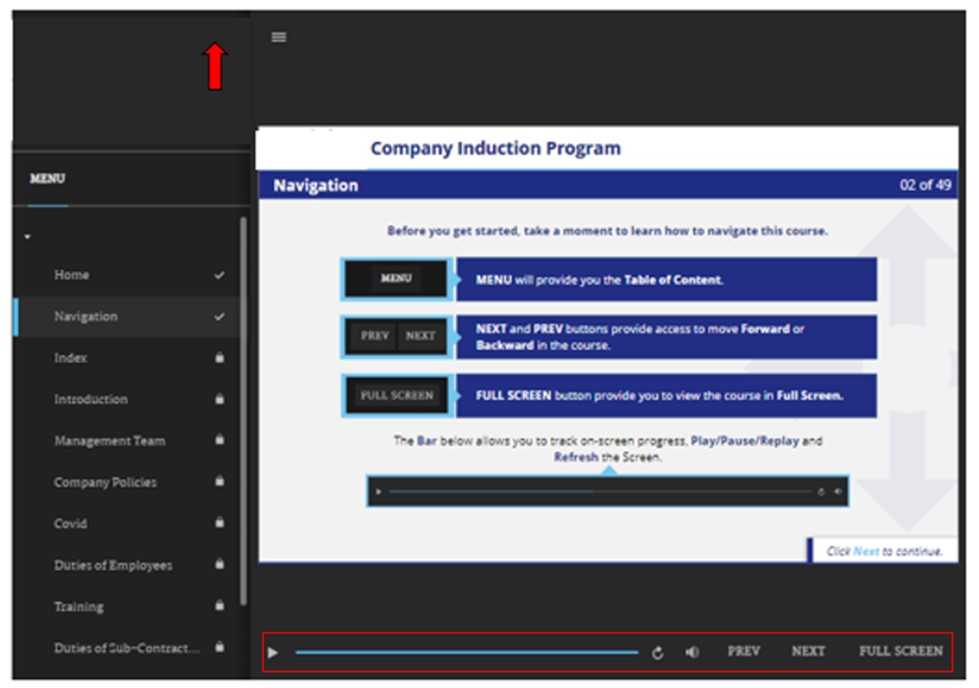
Step 8. Once you are finished with the slides, please click on the “Exit” button, and proceed to complete the QUIZ. If you want to revisit any of the previous slides, you can do so by opening the menu on the top left and going back to any of the specific slides.
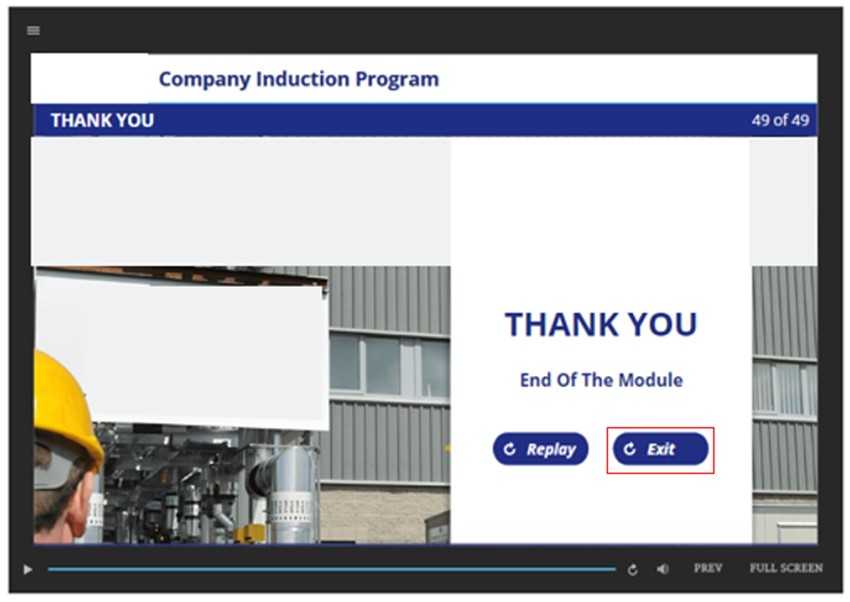
Step 9. When you click on exit, please choose the second point and it will take you to the Induction Program Quiz.
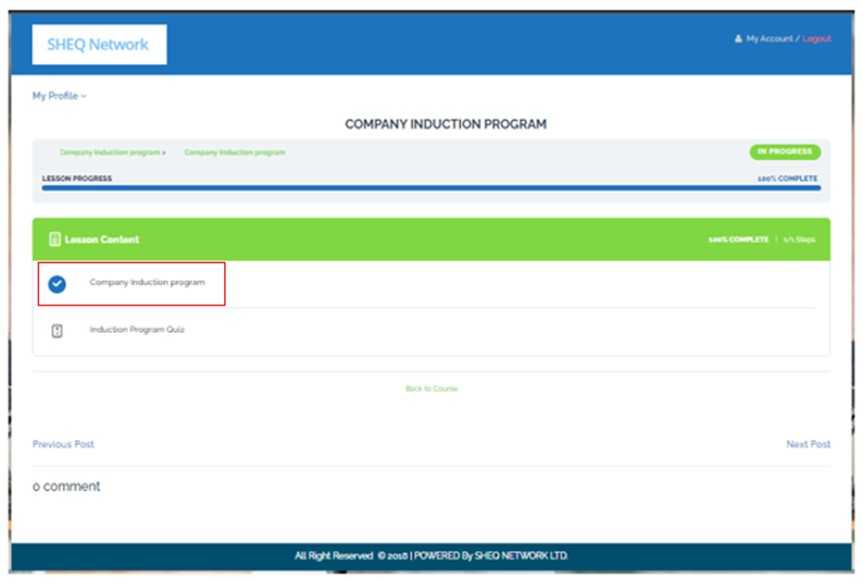
Step 10. Please click on the “Induction Program Quiz” button to start the quiz.
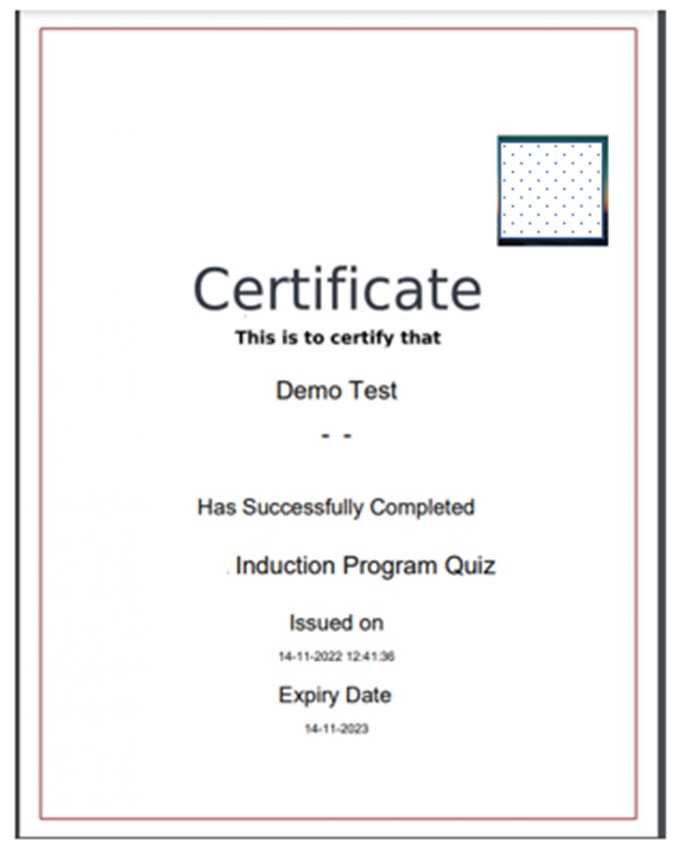
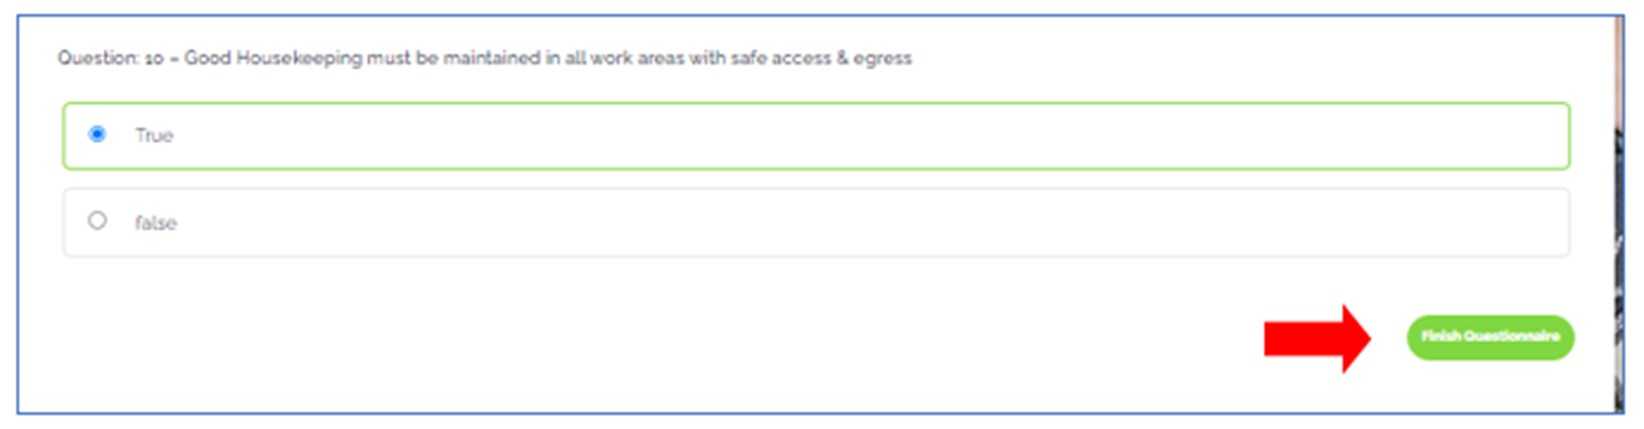
Step 11. When you have completed the Quiz, please click on the Finish Questionnaire button. When you have achieved the necessary Pass Mark your certificate of completion will be available.
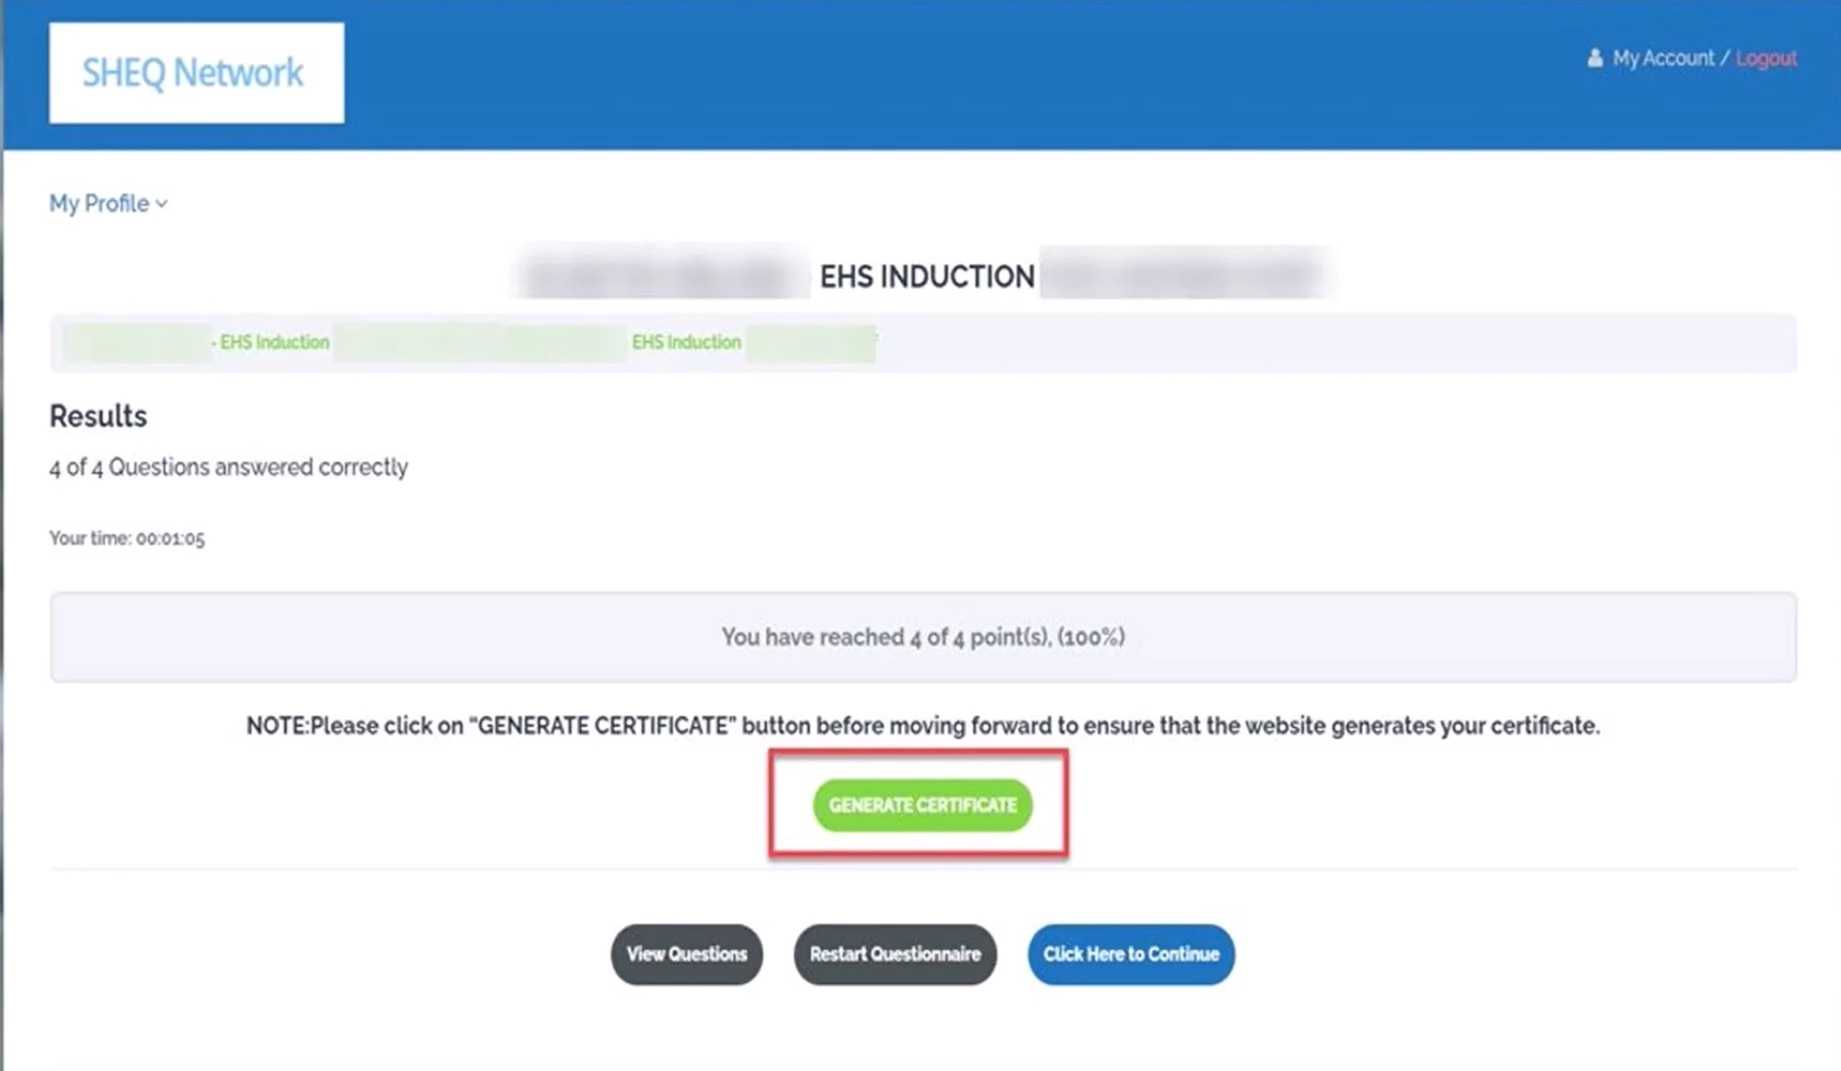
VERY IMPORTANT- YOU MUST CLICK GENERATE CERTIFICATE TO VERIFY THAT YOU HAVE A VALID CERTIFICATE OF COMPLETION. YOU MAY NEED TO BRING THE CERT WITH YOU TO THE CLIENT SITE (PRINTED OR A COPY ON YOUR PHONE). A COPY OF THE CERTIFICATE SHOULD ALSO BE UPLOADED ONTO THE mai™ CONTRACTOR PORTAL SO THAT CLIENT SECURITY PERSONNEL CAN REVIEW AND GRANT SITE ACCESS AS REQUIRED..